How to Build Your Own Graphics for Online Training Courses |  |

| How to Build Your Own Graphics for Online Training Courses Posted: 07 May 2013 12:30 AM PDT
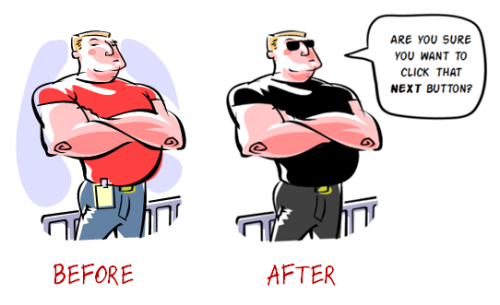
At a recent workshop I was showing someone how I make some of the graphics I use for the blog. As I was showing her an idea, she said that while she already knew the basic steps what she really found valuable was watching me do it and then explain why I did what I did. I think she's right. It is helpful to not only know how to do something, but to also know what the person's thinking while doing it. So in today's post, I'll show you how I created some graphics for a few recent blog posts. You'll learn some production tips and gain some perspective on the choices I make. Modify Existing Clip Art to Get What You NeedI'm not the biggest fan of clip art because some of the images tend to look cheap and dated. Another problem is that while there's a lot of clip art to use, there's not a lot of usable clip art. While I'm not a fan of clip art, I am a fan of inexpensive assets that I can customize. And that's where clip art wins the day. There are quite a few things you can do to make it work for your courses. And the reality is that many elearning developers are limited to the free clip art images they get with Microsoft Office. So if that's the constraint you work with, today's post will give you some ideas on how to customize your existing clip art graphics. Example 1: How to Customize Clip Art for E-LearningIn the post titled, Sometimes It's Good to Stop Your Learners Before They Get Started, I wanted an image of a locked gate. But I couldn't quite find what I wanted so I decided on a bouncer image.
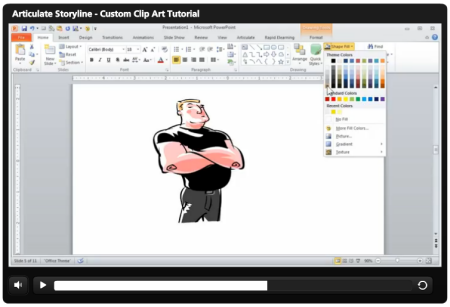
I liked the look of the art work I found, but I didn't really want the background or the original clothes colors. I wanted something a bit more menacing. So I opted for a dark shirt and then added the glasses. View the tutorial below to see how I modified the clip art and learn more about some of the decisions I made in the process.
Click here to view the tutorial. Free assets:
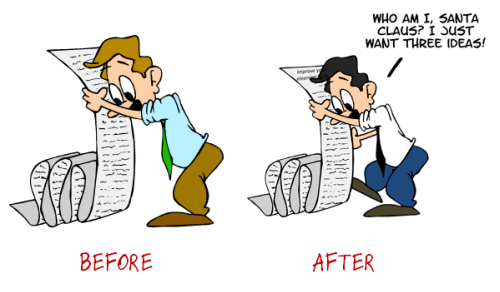
Example 2: How to Customize Clip Art for E-LearningHere's a slightly different type of modification. In the post titled, 3 Ways to Improve Your E-Learning Design Skills, I wanted an image of someone holding a list. The options were a little slim so I went with the image below. Truth be told, I'm not really fond of this clip art style. But if it's all I have then what can I do to make it work better for me?
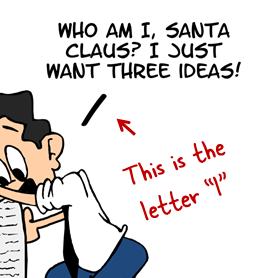
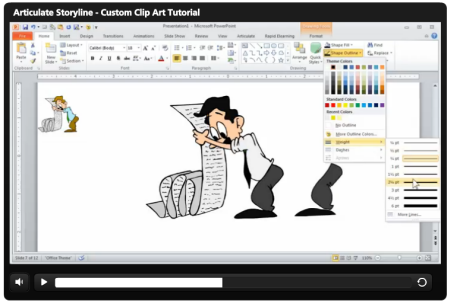
I can't fix the art style, but I can tone down the colors. I made his clothes color a bit more conservative—dark tie, light shirt, and darker pants. I also made his hair a bit darker. In this image it looks like he's missing an arm and leg. So I added a bit of depth to the image by adding an arm and leg. Now here's a trade secret, you can't share this with others. You'll also notice that in lieu of a chat cloud I just went with a line that connects the text to the character. The font is kind of a cartoony font and a bit organic. So it doesn't have straight lines. If I used a regular line for the callout, it wouldn't look quite right because it would be too straight.
So to get the line I need, I used a letter "i" from the same font and increased the size a bit. Now I have an organic line that matches the style of the font. Here's a tutorial that show how I modified the clip art and added the extra leg and arms.
Click here to view the tutorial. So there you have it—a few simple ways to create your own graphics using existing clip art images. This really comes in handy if all you have is clip art. You may not always like the starting image, but with a little practice you can virtually build any image you need. To learn more about working with clip art, check out some of the tutorials below. One of my favorites is how to create an elearning template using a single clip art style.
Tidbits I'll be in London next week. It's not too late to sign up. Also, be sure to check out the upcoming sessions in Philadelphia and Florida.
Download your free 46-page ebook: The Insider's Guide to Becoming a Rapid E-Learning Pro |
| You are subscribed to email updates from The Rapid eLearning Blog To stop receiving these emails, you may unsubscribe now. | Email delivery powered by Google |
| Google Inc., 20 West Kinzie, Chicago IL USA 60610 | |
No comments:
Post a Comment